Add a rate limiter and a message broker to your Node.js API
Mitigate DDoS and brute force attacks with a rate limiter. Distribute time-consuming tasks among multiple workers with a RabbitMQ message broker. This is a follow up of the previous API related post.
July 21, 2020
What is covered
Code repository
Online resources
- Node.js API for authentication using JSON Web Tokens (JWT) and refresh tokens
- RabbitMQ - the most widely deployed open source message broker
- RabbitMQ work queues tutorial
- rate-limiter-flexible mitigates DDoS and brute force attacks
- Redis - an open source in-memory data structure store
Updating docker-compose.yml to add Redis and RabbitMQ containers
We need two more containers for the services required to implement the proposed features, one running Redis and the other RabbitMQ. To do that, we need to edit docker-compose.yml. Take a look at lines 27-49 to see what Docker images are used, how the credentials are set and how we add restart: always to make sure the containers are running after each server restart. Take alook at README.md for the environment variables you need to set.
version: "3.6"
services:
  postgres:
    image: postgres:12
    ports:
      - ${HASURA_POSTGRES_PORTS}
    restart: always
    volumes:
      - db_data:/var/lib/postgresql/data
    environment:
      POSTGRES_PASSWORD: ${HASURA_POSTGRES_PASSWORD}

  graphql-engine:
    image: hasura/graphql-engine:v1.2.2
    ports:
      - ${HASURA_GRAPHQL_ADMIN_PORTS}
    depends_on:
      - "postgres"
    restart: always
    environment:
      HASURA_GRAPHQL_DATABASE_URL: postgres://${HASURA_POSTGRES_USER}:${HASURA_POSTGRES_PASSWORD}@postgres:${HASURA_POSTGRES_PORT}/postgres
      HASURA_GRAPHQL_ENABLE_CONSOLE: ${HASURA_GRAPHQL_ENABLE_CONSOLE}
      HASURA_GRAPHQL_ENABLED_LOG_TYPES: ${HASURA_GRAPHQL_ENABLED_LOG_TYPES}
      HASURA_GRAPHQL_ADMIN_SECRET: ${HASURA_GRAPHQL_ADMIN_SECRET}
      HASURA_GRAPHQL_JWT_SECRET: ${HASURA_GRAPHQL_JWT_SECRET}

  redis:
    image: docker.io/bitnami/redis:6.0-debian-10
    environment:
      - ALLOW_EMPTY_PASSWORD=no
      - REDIS_PASSWORD=${REDIS_PASSWORD}
      - REDIS_DISABLE_COMMANDS=${REDIS_DISABLE_COMMANDS}
    ports:
      - ${REDIS_PORTS}
    restart: always
    volumes:
      - redis_data:/bitnami/redis/data

  rabbitmq:
    image: bitnami/rabbitmq:latest
    environment:
      - RABBITMQ_USERNAME=${RABBITMQ_USERNAME}
      - RABBITMQ_PASSWORD=${RABBITMQ_PASSWORD}
    ports:
      - ${RABBITMQ_PORTS}
      - ${RABBITMQ_PORTS_ADMIN}
    restart: always
    volumes:
      - rabbitmqstats_data:/bitnami

volumes:
  db_data:
  redis_data:
    driver: local
  rabbitmqstats_data:
    driver: local
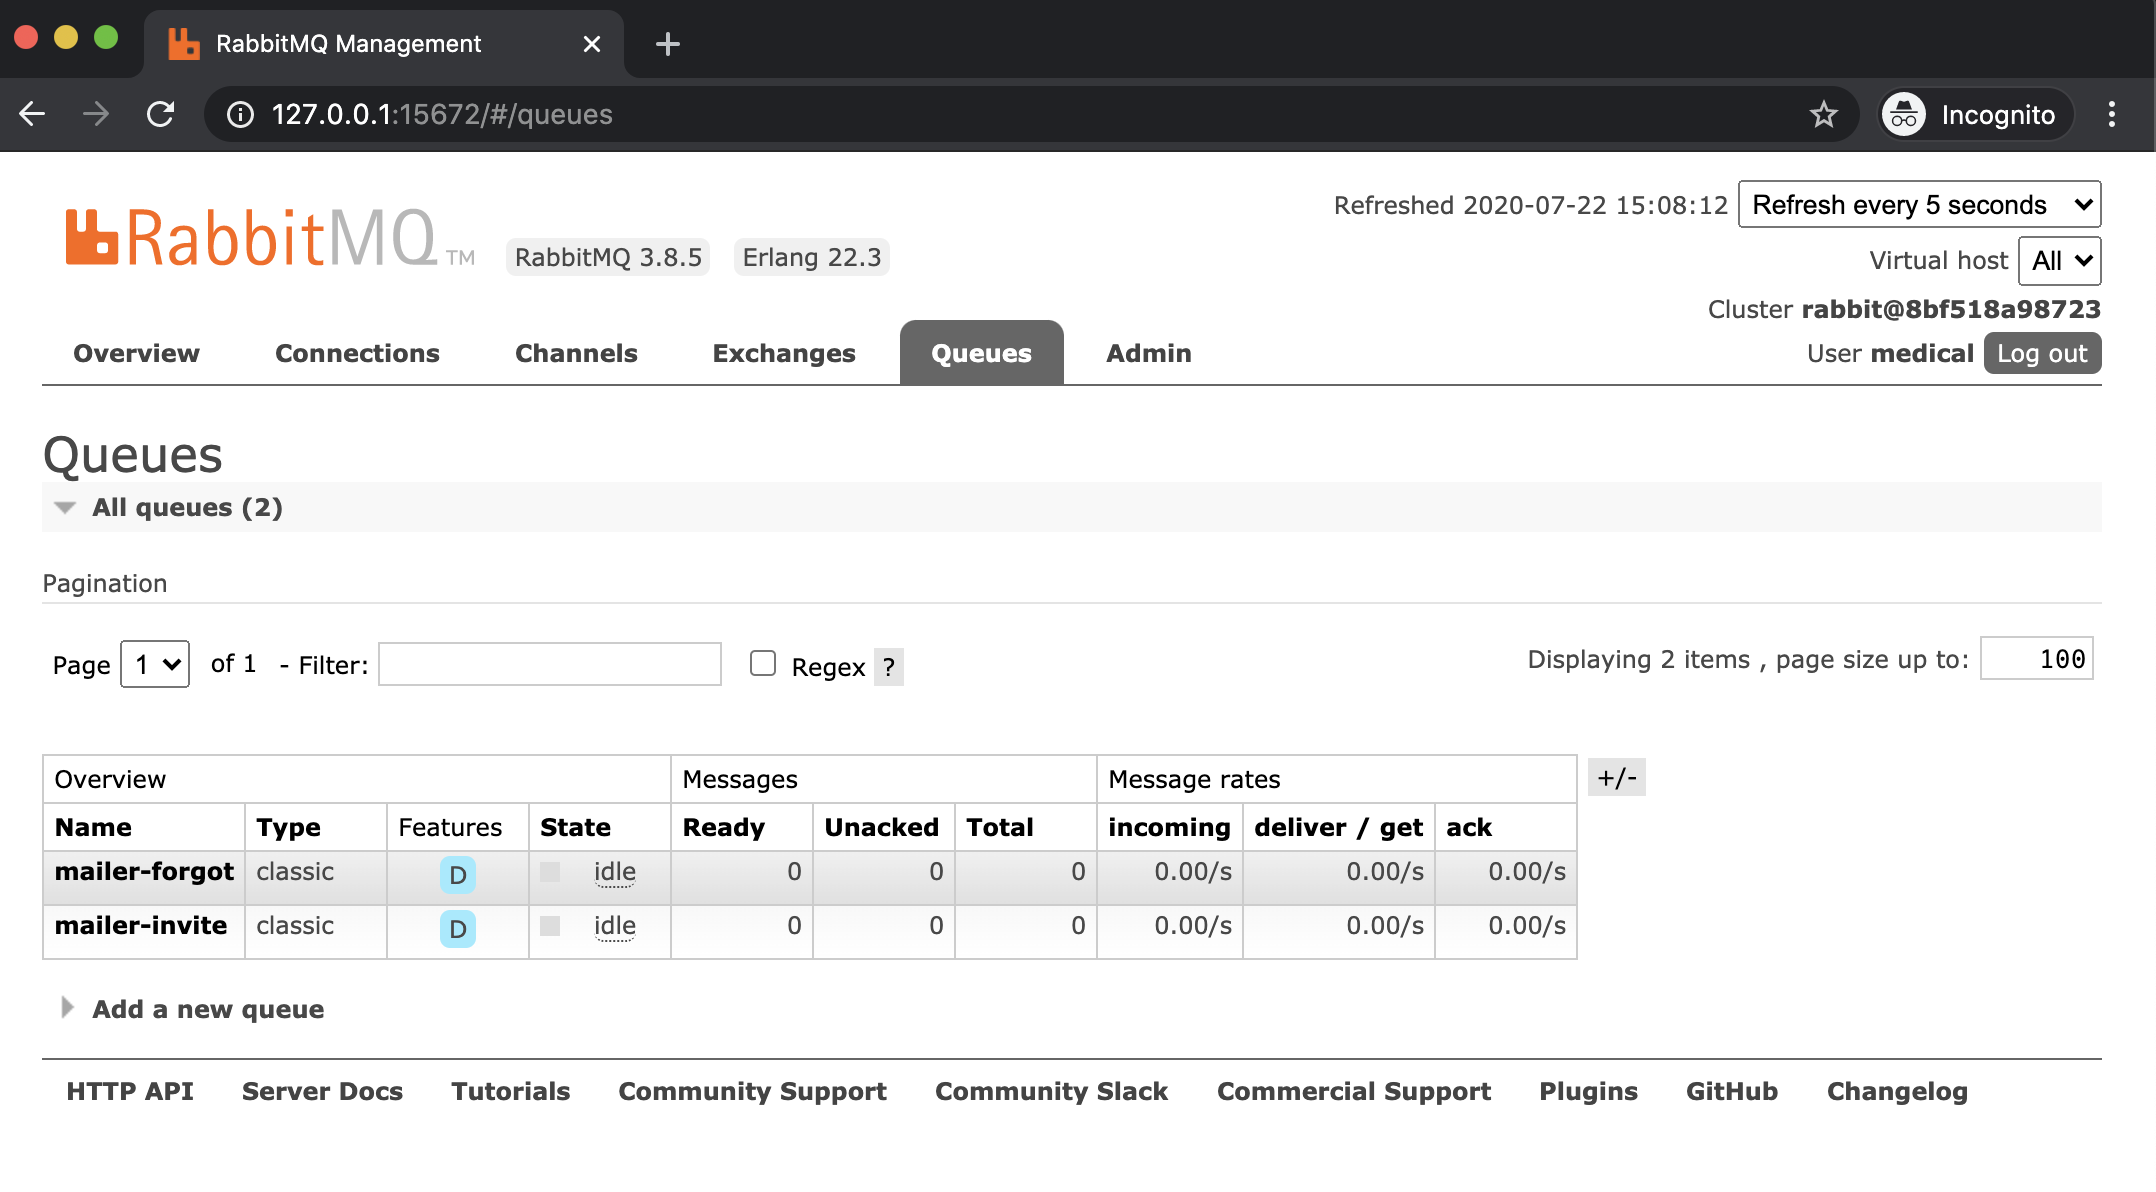
You can access the RabbitMQ Management web interface using the environment variables (host, port, username, password).
Rate limiter Express middleware
The documentation of the node-rate-limiter-flexible package is giving us everything we need to add this middleware /authentication/src/middlewares/rateLimiterRedis.js. It keeps a count of requests by IP and blocks access if the points are spent, in our case 15 requests per second (lines 20-21).
const redis = require('redis');
const { RateLimiterRedis } = require('rate-limiter-flexible');
const Boom = require('@hapi/boom');

let rateLimiterMiddleware = (req, res, next) => {
  next();
};

if (process.env.NODE_ENV !== 'test') {
  const redisClient = redis.createClient({
    host: process.env.REDIS_HOST,
    port: process.env.REDIS_PORT,
    enable_offline_queue: false,
    password: process.env.REDIS_PASSWORD,
  });

  const rateLimiter = new RateLimiterRedis({
    storeClient: redisClient,
    keyPrefix: 'middleware',
    points: 15, // 15 requests
    duration: 1, // per 1 second by IP
  });

  rateLimiterMiddleware = (req, res, next) => {
    rateLimiter
      .consume(req.ip)
      .then(() => {
        next();
      })
      .catch(() => {
        next(Boom.tooManyRequests('Too Many Requests'));
      });
  };
}

module.exports = rateLimiterMiddleware;
We are adding this middleware to the Express /authentication/src/server.js file only for production and development (lines 12-14).
const path = require('path');
const express = require('express');
const cors = require('cors');
const cookieParser = require('cookie-parser');
const bodyParser = require('body-parser');
const helmet = require('helmet');

const { httpLogger, rateLimiterRedis } = require('./middlewares');

const app = express();

if (process.env.NODE_ENV !== 'test') {
  app.use(rateLimiterRedis);
}

app.use(
  cors({
    credentials: true,
    origin: true,
  })
);

app.use(bodyParser.urlencoded({ extended: false }));
app.use(bodyParser.json());

app.use(cookieParser());
app.use(httpLogger);
app.disable('x-powered-by');
app.use(helmet());

app.use('/api/authentication', require('./controllers/users'));
app.use(require('./middlewares/handleErrors'));

if (process.env.NODE_ENV === 'development') {
  app.use('/api-docs', require('./utils/swagger'));
}

if (process.env.NODE_ENV === 'production') {
  const frontendPath = path.join(__dirname, '../..', 'frontend/build');
  app.use(express.static(frontendPath));

  app.get('*', (req, res) => {
    res.sendFile(path.join(frontendPath, 'index.html'));
  });
}

module.exports = app;
Message broker package
/packages/message-broker/index.js is the main script of this package, exporting the two functions publish and consume. /packages/message-broker/src/publish.js can be used, let's say, in a handler function of an API endpoint and we have to provide the RabbitMQ queue name and the stringified message. It returns a promise.
const open = require('./open');

module.exports = (queue, task) => {
  return open
    .then((conn) => conn.createChannel())
    .then((ch) => {
      return ch.assertQueue(queue, { durable: true }).then(() => {
        return ch.sendToQueue(
          queue,
          Buffer.from(task),
          { persistent: true },
          (err, ok) => !!ok
        );
      });
    })
    .catch((err) => {
      console.log(err);
    });
};
/packages/message-broker/src/consume.js file is starting a worker that is listening for tasks to consume from RabbitMQ. We have to pass the queue name and the consumer function. That one is called with the stringified message and the channel to be able to acknowledge that the task was completed. Imported open is a promise returned by the amqp.connect function.
const open = require('./open');

module.exports = (queue, consumer) => {
  open
    .then((conn) => conn.createChannel())
    .then((ch) => {
      return ch
        .assertQueue(queue, { durable: true })
        .then(() => ch.prefetch(1))
        .then(() => {
          return ch.consume(
            queue,
            (msg) => {
              if (msg !== null) {
                consumer(msg, ch);
              }
            },
            { noAck: false }
          );
        });
    })
    .catch((err) => {
      console.log(err);
    });
};
Email sending workers
We can make use of the @medical-equipment-tracker/message-broker package by spinning up as many workers we need depending on the specific tasks and on the load. RabbitMQ will use round-robin dispatching to each of the available workers subscribed to a particular queue. The prefetch option is set up like so to make sure a worker receives a task to consume only if it is not busy.
const { consume } = require('@medical-equipment-tracker/message-broker');
const mailer = require('@medical-equipment-tracker/mailer');

const logger = require('../src/services/logger');
const renderTextMessage = require('../src/utils/emailTemplates/inviteSignup/textTemplate');
const renderHtmlMessage = require('../src/utils/emailTemplates/inviteSignup/htmlTemplate');

const consumer = async (msg, ch) => {
  const { to, renderVars } = JSON.parse(msg.content);
  logger.info(`[WORKER_MAILER_INVITE] signup invite mail to send to ${to}`);

  try {
    await mailer.sendMail({
      from: 'noreply@medical.equipment',
      to,
      subject: 'Invitation to create an account on medical.equipment',
      text: renderTextMessage(renderVars),
      html: renderHtmlMessage(renderVars),
    });

    ch.ack(msg);
  } catch (error) {
    logger.error('[WORKER_MAILER_INVITE] inviteSignup email error', error);
  }
};

consume(process.env.WORKER_MAILER_INVITE_QUEUE, consumer);