Setup https for a local domain name using your own root CA
This is the second episode of a guide on how you can set up HTTPS for a server on the local network by creating your own SSL Certificate Authority.
July 05, 2020
There is, of course, the possibility of an SSL certificate purchase or of a Let’s Encrypt free SSL but I do not know if the intranet where the application I am working on would be connected to the Internet. I need to have a working solution even if it would not be.
TL;DR
You can avoid those screens rendered by browsers related to unsecured connection or to untrusted SSL certificate. First of all, it is dangerous to instruct your users to ignore those messages and proceed despite the security risk. What you need to do for the self signed SSL certificates to be validated by browsers is to add the root Certificate Authority to all devices from your network, OS level I mean. The only problem I encountered was for Firefox that does not accept the system added root CA. You need to add it to the browser itself.
What is covered
Online resources
- How to Create Your Own SSL Certificate Authority for Local HTTPS Development by Brad Touesnard
- Configuring SSL by using untrusted certificates from IBM Knowledge Center
- Official List of Trusted Root Certificates on Android by Vincent Lynch from DigiCert
Generate the root CA
It is quite simple to become a Certificate Authority recognized only on the local level. You need to issue two commands using openssl. Take your time to add a password to the root.key and to fill in all the information associated to the certificate as instructed.
openssl genrsa -des3 -out root.key 4096
openssl req -new -x509 -sha256 -days 3650 -key root.key -reqexts v3_req -extensions v3_ca -out root.crt
Install root CA on devices from your network
The root.crt file previously generated is the one we need to add to the operating system of the devices of our local network. Please refer to Brad Touesnard’s blog post to find out how you can do this for macOS. The documentation from IBM Knowledge Center describes very clearly what you need to do for various mobile devices.
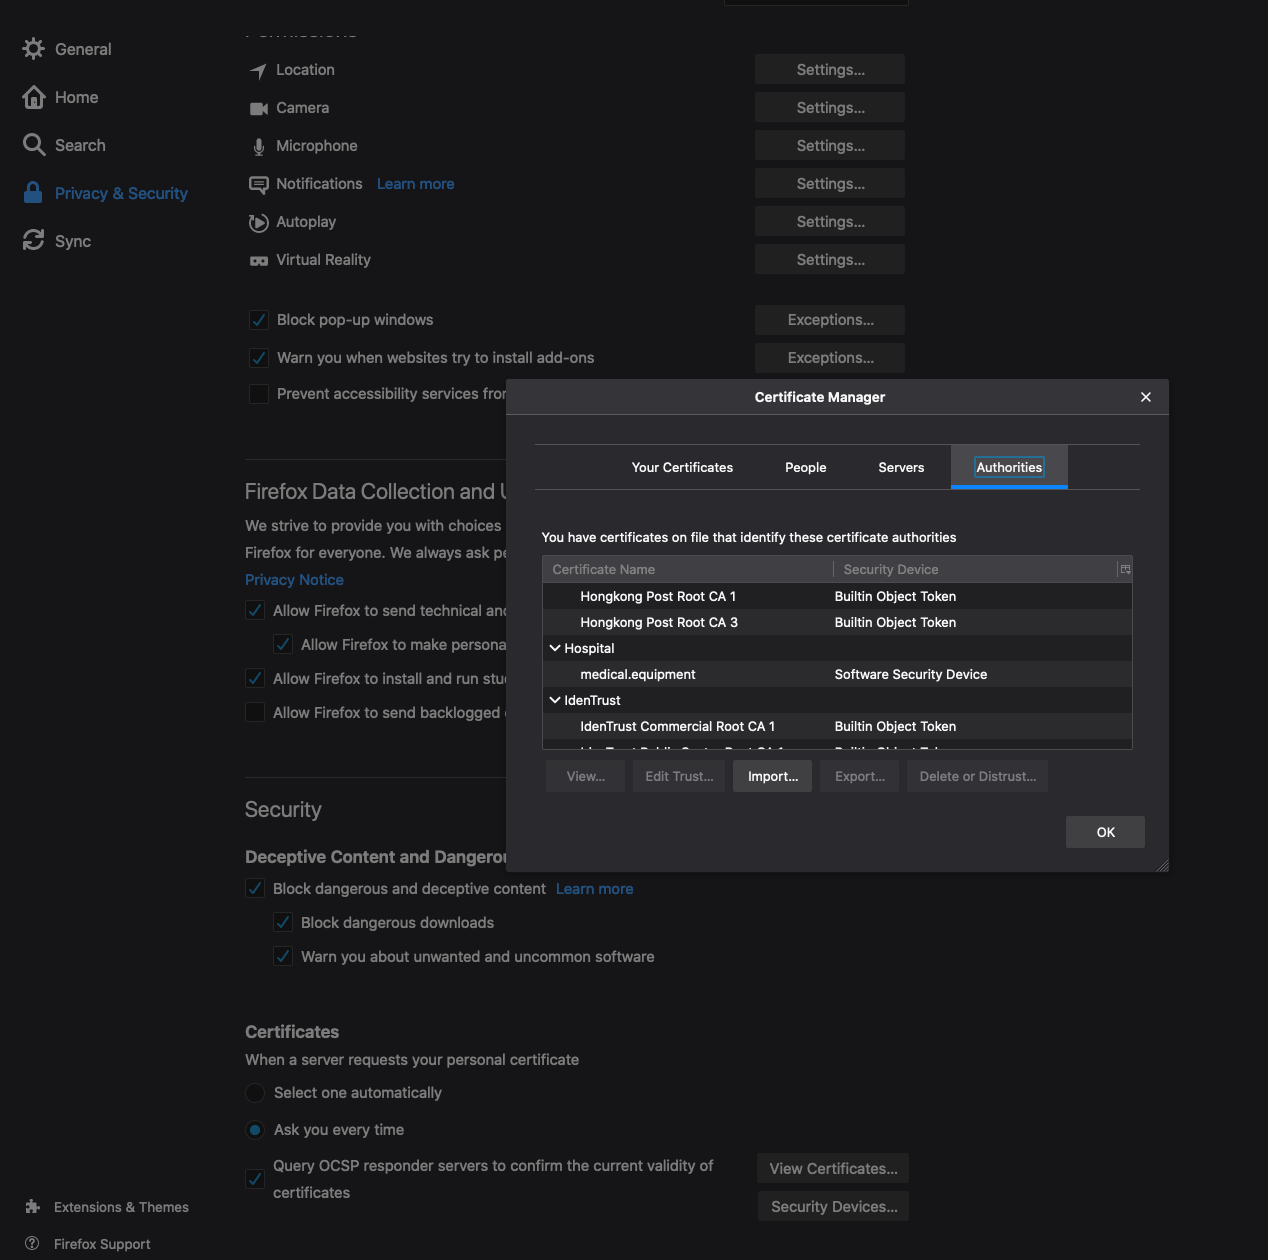
To add it to Firefox, as I mentioned in the tl:dr, go to Preferences > Privacy & Security > Certificates > View Certificates > Authorities > Import.
Generate the server SSL certificate using the root CA
As for the root CA, we first need to generate a key file for which we have to fill in all the required data.
openssl genrsa -out server.key 4096
Before signing this server.key with the root CA, we also need to generate a certificate request with it.
openssl req -new -key server.key -out server.csr
Sign the server certificate
openssl x509 -req -in server.csr -CA root.crt -CAkey root.key -CAcreateserial -out server.crt -days 825 -sha256 -extfile server.ext
I found out that this server.crt signed with the root CA does not satisfy the format requirements of Android OS according to this article. We are going to need this configuration file openssl.cnf:
[ca]
default_ca          = CA_default            # The default ca section

[CA_default]
dir                 = .                     # top dir
database            = $dir/index.txt        # index file.
new_certs_dir       = $dir                  # new certs dir

certificate         = $dir/root.crt         # The CA cert
serial              = $dir/root.srl         # serial no file
private_key         = $dir/root.key         # CA private key
RANDFILE            = $dir/.rand            # random number file

default_days        = 825                   # how long to certify for
default_crl_days    = 30                    # how long before next CRL
default_md          = sha256                # md to use

policy              = policy_any            # default policy
email_in_dn         = no                    # Don't add the email into cert DN
x509_extensions     = v3_req

name_opt            = ca_default            # Subject name display option
cert_opt            = ca_default            # Certificate display option
copy_extensions     = copy                  # Copy extensions from request

[policy_any]
countryName            = supplied
stateOrProvinceName    = optional
organizationName       = optional
organizationalUnitName = optional
commonName             = supplied
emailAddress           = optional


[req]
default_bits        = 4096
attributes          = req_attributes

distinguished_name  = req_distinguished_name
x509_extensions     = v3_ca
req_extensions      = v3_req
default_md          = sha256

utf8                = yes
dirstring_type      = nobmp

[req_distinguished_name]
emailAddress = test@email.address
countryName                     = Country Name (2 letter code)
countryName_default             = RO
countryName_min                 = 2
countryName_max                 = 2

stateOrProvinceName             = State or Province Name (full name)
stateOrProvinceName_default     = Bucharest

localityName                    = Locality Name (eg, city)

0.organizationName              = Organization Name (eg, company)
0.organizationName_default      = Hospital

organizationalUnitName          = Organizational Unit Name (eg, section)
organizationalUnitName_default  = Covid

commonName                      = Common Name (eg, YOUR name)
commonName_max                  = 64

emailAddress                    = Email Address
emailAddress_max                = 40

[req_attributes]
challengePassword       = A challenge password
challengePassword_min   = 4
challengePassword_max   = 20

[v3_ca]
basicConstraints        = CA:TRUE
subjectKeyIdentifier    = hash
authorityKeyIdentifier  = keyid:always,issuer:always
keyUsage                = cRLSign, dataEncipherment, digitalSignature, keyCertSign, keyEncipherment, nonRepudiation

[v3_req]
basicConstraints        = CA:FALSE
subjectKeyIdentifier    = hash
authorityKeyIdentifier  = keyid,issuer
keyUsage                = digitalSignature, nonRepudiation, keyEncipherment, dataEncipherment
subjectAltName          = @altNames


[altNames]
DNS.1 = medical.equipment
DNS.2 = *.medical.equipment
DNS.3 = *.*.medical.equipment
Before trying another method of generating the server.crt we need to remove the old one and to add an index.txt file:
rm server.crt
touch index.txt
Now we sign the version of the server.crt that includes the X.509 format:
openssl ca -in server.csr -config openssl.cnf -days 825 -out server.crt
You can verify the resulted server.crt like this:
openssl verify -verbose -CAfile root.crt server.crt
Generate a dhparam.pem for NGINX:
openssl dhparam -out dhparam.pem 2048
Add the server self signed SSL certificate to NGINX
You can edit your NGINX (version nginx/1.18.0 Ubuntu) site configuration file like this to make use of the server certificate:
sudo nano /etc/nginx/sites-available/default
The server definition may one similar to this one:
server {
  listen 443 ssl default_server;
  listen [::]:443 ssl default_server;

  include snippets/self-signed.conf;
  include snippets/ssl-params.conf;

  root /home/ubuntu/sites/medical-equipment-tracker;
  index index.html index.htm;
  server_name medical.equipment;

  location / {
    try_files $uri $uri/ =404;
  }
}
The /etc/nginx/snippets/self-signed.conf file content can be:
ssl_certificate /home/ubuntu/certs/server.crt;
ssl_certificate_key /home/ubuntu/certs/server.key;
The content of /etc/nginx/snippets/ssl-params.conf file may be:
ssl_protocols TLSv1.2;
ssl_prefer_server_ciphers on;
ssl_dhparam /home/ubuntu/certs/dhparam.pem;
ssl_ciphers ECDHE-RSA-AES256-GCM-SHA512:DHE-RSA-AES256-GCM-SHA512:ECDHE-RSA-AES256-GCM-SHA384:DHE-RSA-AES256-GCM-SHA384:ECDHE-RSA-AES256-SHA384;
ssl_ecdh_curve secp384r1;
ssl_session_timeout  10m;
ssl_session_cache shared:SSL:10m;
ssl_session_tickets off;
ssl_stapling on;
ssl_stapling_verify on;
resolver 8.8.8.8 8.8.4.4 valid=300s;
resolver_timeout 5s;
add_header X-Content-Type-Options nosniff;
add_header X-XSS-Protection "1; mode=block";