Clerk authentication, authorization, Upstash limiter, Axiom logging
This is a continuation of the previous article, adding new features to the search-to-rent OpenAPI. The main objective is to get it ready for deployment using Bun in a Docker container. So, let's add to it Clerk authentication, authorization, an Upstash rate limiter, and an Axiom logger.
February 29, 2024
Before we begin, you may want to also understand the context of this search-to-rent application built with Bun, Hono, Drizzle, PlanetScale, Algolia, CloudAMQP by reading this previous article here.
What is covered
Code repository
Online resources
- Real estate API for a search-to-rent application
- Clerk - The most comprehensive User Management Platform
- Upstash - Serverless Data Platform
- upstash/ratelimit: Rate limiting library for serverless runtimes
- Axiom - Logging|re-invented. Stop sampling, observe every event.
- Axiom Transport for Winston logger
- Fly.io - Launch Apps Near Users. Fly.io transforms containers into micro-VMs that run on our hardware in 30+ regions on six continents.
Clerk organization setup
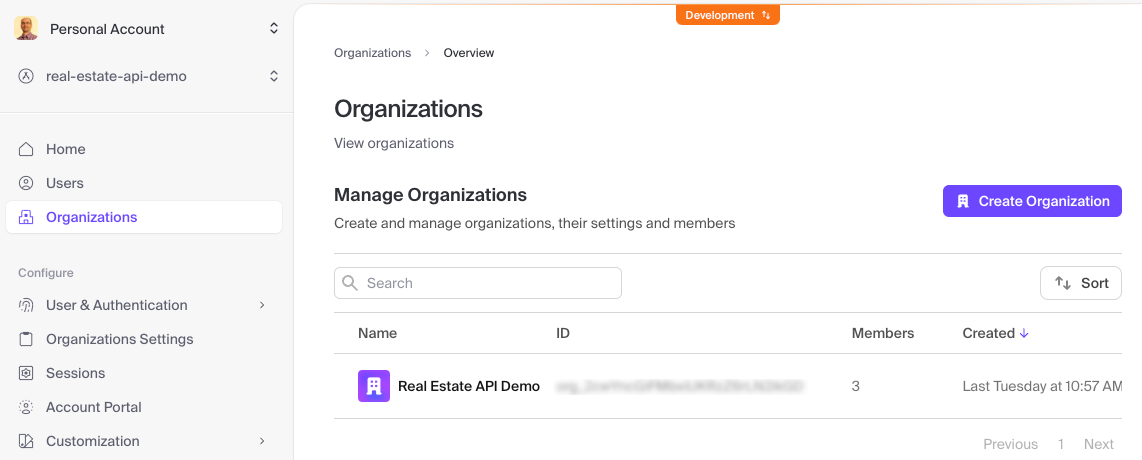
As with any other project, please take a little time to look at the /README.md file to understand how to configure all third-party services. Our objective on the Clerk dashboard is to create an organization and define Creator and Reader roles. Based on that, we will be able to assign at least one of the verified members to each role.

We need a custom JWT template to have the claims we want inside the token payload. For API testing purposes, we can temporarily assign a longer token lifetime. We will change that to a standard one-minute lifetime when working on the front end.
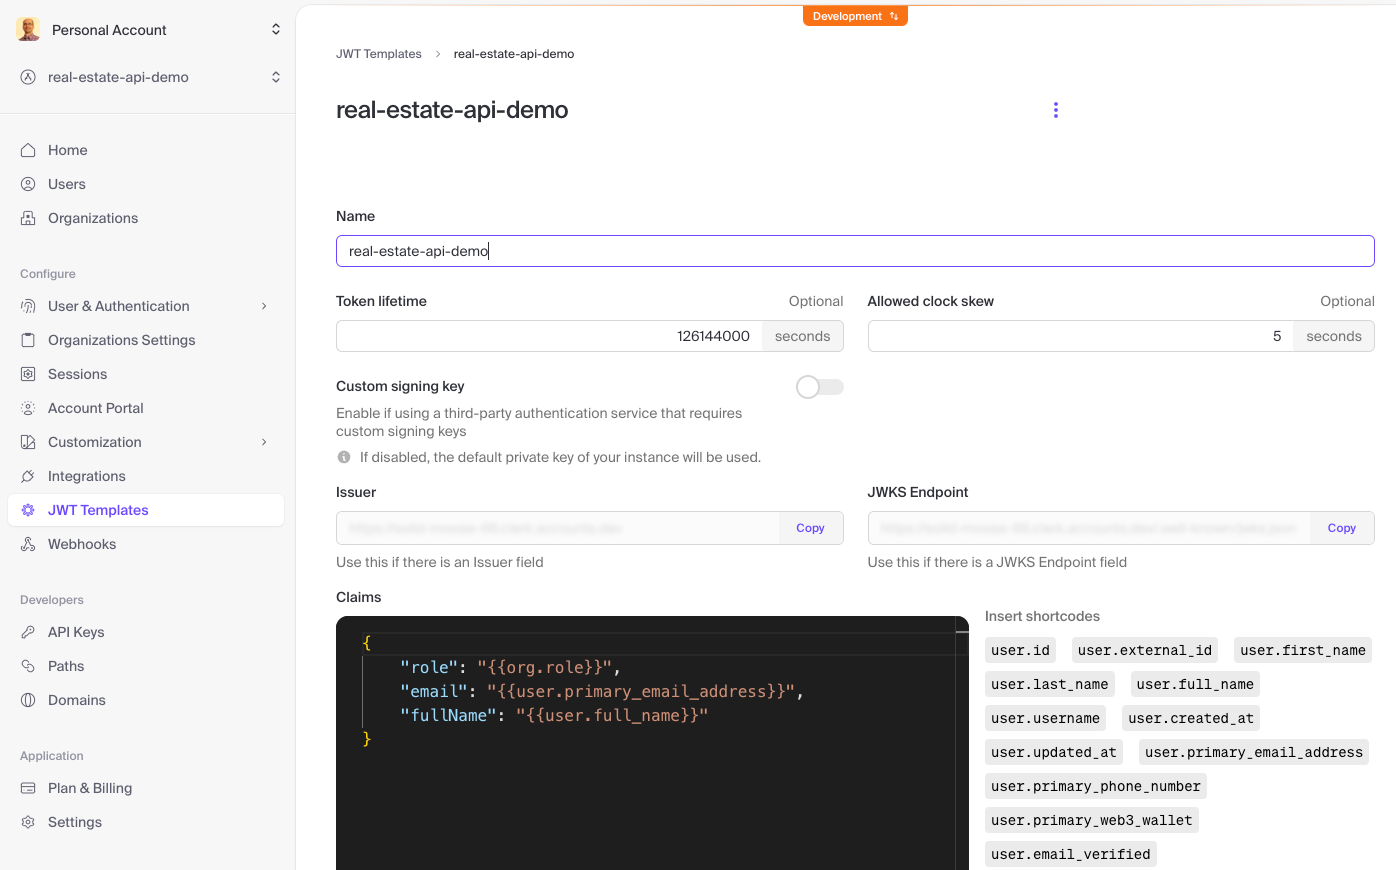
To find out how you can generate a test JWT based on a custom template, take a look at this article. Until we can have our own front end to login and get a long-lived JWT, we can use this nice and to-the-point organization demo application provided by the good people at Clerk.
Hono isAuthenticated and isCreator middleware
Did I mention before that Yusuke Wada is a rock star? Not only did he create Hono, but he is also puting together a phenomenal documentation and examples. Here we make use of the clerkMiddleware to be able to get the auth object from Hono Context inside of /src/middlewares/isAuthenticated.ts and /src/middlewares/isCreator.ts.
import { getAuth } from '@hono/clerk-auth';
import { MiddlewareHandler } from 'hono';

import { AuthOrg } from '@/types';
import { badRequestResponse } from '@/utils';

const isAuthenticated: MiddlewareHandler = async (c, next) => {
  const auth: AuthOrg = getAuth(c);

  if (!auth?.userId) {
    return c.json(
      badRequestResponse({
        reason: 'unauthorized',
        message: 'you are not logged in',
        path: ['authorization'],
      }),
      401,
    );
  }

  await next();
};

export default isAuthenticated;
import { getAuth } from '@hono/clerk-auth';
import { MiddlewareHandler } from 'hono';

import { AuthOrg } from '@/types';
import { badRequestResponse } from '@/utils';

const isCreator: MiddlewareHandler = async (c, next) => {
  const auth: AuthOrg = getAuth(c);

  if (!auth || auth.sessionClaims?.role.indexOf('org:creator') === -1) {
    return c.json(
      badRequestResponse({
        reason: 'forbidden',
        message: 'you are not a creator',
        path: ['role'],
      }),
      403,
    );
  }

  await next();
};

export default isCreator;
Upstash rate limiter
Here is a serious article on rate limiting with the sliding window algorithm, written by Mohamed El-Bably. /src/middlewares/rateLimiter.ts middleware is using an Upstash Redis instance to be able to implement a sliding window limiter based on the client IP address, as added by Fly.io to the request headers.
Rate limiting is a fundamental method for managing the flow of traffic to a service or server by imposing restrictions on the number of requests that can be made within a specific time window. This essential technique is widely employed in various network and web applications to ensure the orderly and secure operation of systems.
import { Ratelimit } from '@upstash/ratelimit';
import { Redis } from '@upstash/redis';
import { MiddlewareHandler } from 'hono';

import { badRequestResponse } from '@/utils';

const rateLimiter: MiddlewareHandler = async (c, next) => {
  if (
    !process.env.UPSTASH_REDIS_REST_URL ||
    !process.env.UPSTASH_REDIS_REST_TOKEN
  ) {
    await next();
    return;
  }

  const redis = new Redis({
    url: process.env.UPSTASH_REDIS_REST_URL,
    token: process.env.UPSTASH_REDIS_REST_TOKEN,
  });

  const rateLimit = new Ratelimit({
    redis,
    limiter: Ratelimit.slidingWindow(10, '10 s'),
    analytics: true,
  });

  const identifier = c.req.header('Fly-Client-IP') || 'anonymous';

  const { success } = await rateLimit.limit(identifier);

  if (!success) {
    return c.json(
      badRequestResponse({
        reason: 'too many requests',
        message: `you have exceeded the rate limit`,
        path: ['request'],
      }),
      429,
    );
  }

  await next();
};

export default rateLimiter;
Swagger documentation updates for authentication, authorization and rate limiter
We need to register a security schema with the Zod OpenAPI inside of /src/server.ts to be able to specify it when we are creating routes.
app.openAPIRegistry.registerComponent('securitySchemes', 'Bearer', {
  type: 'http',
  scheme: 'bearer',
});
Now we can update route definitions with the appropriate security, 401 authentication, and 403 authorization-related error responses. At the end of /src/routes/common/postCreateItem.ts definition you can also see the 429 too many requests error response generated by the rate limiter from above.
import { createRoute, z } from '@hono/zod-openapi';

import {
  CommonInsertSchema,
  CommonInsertSchemaExample,
  NomenclatureTag,
} from '@/types';
import { errorSchema } from '@/validators';

export const successSchema = z.object({
  success: z.literal(true),
  data: z.object({
    id: z.string(),
  }),
});

const postCreateItem = ({
  tag,
  insertItemSchema,
  insertItemSchemaExample,
}: {
  tag: NomenclatureTag;
  insertItemSchema: CommonInsertSchema;
  insertItemSchemaExample: CommonInsertSchemaExample;
}) =>
  createRoute({
    method: 'post',
    path: '/create',
    tags: [tag],
    security: [
      {
        Bearer: [],
      },
    ],
    request: {
      body: {
        description: `<p>Insert a ${tag} object.</p>`,
        content: {
          'application/json': {
            schema: insertItemSchema,
            example: insertItemSchemaExample,
          },
        },
        required: true,
      },
    },
    responses: {
      201: {
        description: `Responds with a success message.`,
        content: {
          'application/json': {
            schema: successSchema,
          },
        },
      },
      400: {
        description: 'Responds with a bad request error message.',
        content: {
          'application/json': {
            schema: errorSchema,
          },
        },
      },
      401: {
        description: 'Responds with an unauthorized error message.',
        content: {
          'application/json': {
            schema: errorSchema,
          },
        },
      },
      403: {
        description: 'Responds with a forbidden error message.',
        content: {
          'application/json': {
            schema: errorSchema,
          },
        },
      },
      429: {
        description: 'Responds with a too many requests error message.',
        content: {
          'application/json': {
            schema: errorSchema,
          },
        },
      },
    },
  });

export default postCreateItem;
Axiom Winston transport
Winston transport for Axiom provided by the @axiomhq/winston package allows us to value existing implementation for the /src/services/logger.ts service while helping to create a stateless Docker container.
import { WinstonTransport as AxiomTransport } from '@axiomhq/winston';
import logSymbols from 'log-symbols';
import { createLogger, format, transports } from 'winston';
import { Logger } from 'winston';
import { ConsoleTransportInstance } from 'winston/lib/winston/transports';

type MockLogger = {
  error: () => void;
  warn: () => void;
  info: () => void;
};

let logger: Logger | MockLogger = {
  error: () => {},
  warn: () => {},
  info: () => {},
};

if (
  process.env.BUN_ENV === 'production' &&
  process.env.AXIOM_API_TOKEN &&
  process.env.AXIOM_DATASET
) {
  const { combine, errors, json } = format;

  const axiomTransport = new AxiomTransport({
    dataset: process.env.AXIOM_DATASET,
    token: process.env.AXIOM_API_TOKEN,
  });

  logger = createLogger({
    level: 'info',
    format: combine(errors({ stack: true }), json()),
    defaultMeta: { service: 'real-estate-api' },
    transports: [axiomTransport],
    exceptionHandlers: [axiomTransport],
    rejectionHandlers: [axiomTransport],
  });
}

if (
  process.env.BUN_ENV &&
  ['development', 'postman', 'algolia'].includes(process.env.BUN_ENV)
) {
  const transportsArr: ConsoleTransportInstance[] = [
    new transports.Console({
      format: format.combine(
        format.timestamp({ format: 'YYYY-MM-DD HH:mm:ss:ms' }),
        format.printf((info) => {
          let symbol;

          switch (info.level) {
            case 'error':
              symbol = logSymbols.error;
              break;
            case 'warn':
              symbol = logSymbols.warning;
              break;
            case 'info':
              symbol = logSymbols.info;
              break;
          }

          if (info.message.includes('success')) {
            symbol = logSymbols.success;
          }

          return `${symbol} ${info.timestamp} ${info.level}: ${info.message}`;
        }),
        format.align(),
        format.colorize({ all: true }),
      ),
    }),
  ];

  logger = createLogger({
    level: 'info',
    transports: transportsArr,
  });
}

export default logger;
Dockerize the Bun application
To build the application, we issue these sequential commands, not to allow Bun to pick up environment variables we do not want to be present in the built version.
bun run move:up; bun run build; bun run move:down
Dockerfile has a minimal configuration because it only needs the built version. It will change once we've got the automated deployment ready.
FROM oven/bun:1

WORKDIR /app

COPY ./build/index.js .

USER bun

EXPOSE 3000/tcp

ENTRYPOINT [ "bun", "index.js" ]
I have added commands to be able to build a Docker image for local use: docker:image:build, docker:container:start, docker:container:stop, all based on the docker-compose.yml. Notice how to employ environment variables. I assume you have installed Docker Desktop application on your machine.
version: '3.8'
services:
  api:
    image: real-estate-api-demo
    ports:
      - 3000:3000
    container_name: real-estate-api-demo-container
    environment:
      - DATABASE_USERNAME=${DATABASE_USERNAME}
      - DATABASE_PASSWORD=${DATABASE_PASSWORD}
      - GCLOUD_API_KEY=${GCLOUD_API_KEY}
      - ALGOLIA_APP_ID=${ALGOLIA_APP_ID}
      - ALGOLIA_ADMIN_API_KEY=${ALGOLIA_ADMIN_API_KEY}
      - CLOUDAMQP_URL=${CLOUDAMQP_URL}
      - CLERK_SECRET_KEY=${CLERK_SECRET_KEY}
      - CLERK_PUBLISHABLE_KEY=${CLERK_PUBLISHABLE_KEY}
      - UPSTASH_REDIS_REST_URL=${UPSTASH_REDIS_REST_URL}
      - UPSTASH_REDIS_REST_TOKEN=${UPSTASH_REDIS_REST_TOKEN}
      - AXIOM_API_TOKEN=${AXIOM_API_TOKEN}
Manual deployment to Fly.io
Disclaimer: Manual deployments are not something to do today, but they are a good opportunity to slowly discover new services, to learn the way they work, and to choose the right methods for automated deployments.
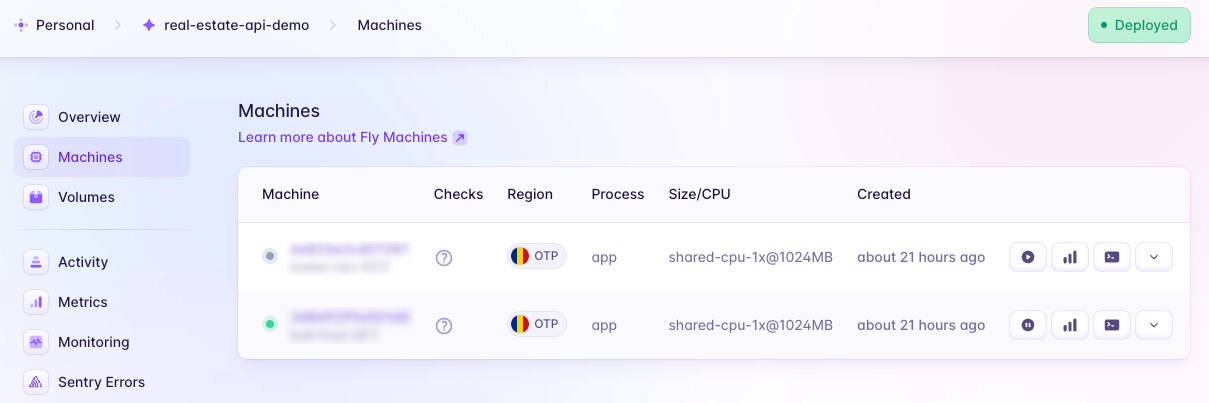
Update: New article published Test and deploy an OpenAPI with Github Actions
For testing purposes, I have deployed the API (see Swagger UI here) at Fly.io because they have datacenters nearby, a very simple deployment process for containerized apps, aided by the tools they offer and a generous subscription. As you can see, I was curious how Bun behaves as a runtime. Take a look here for deployments via a Dockerfile.